 July 11th, 2019
  Nilesh Chaurasia
 Arduino Serial print Function Application
Serial.write() function send the data in ASCII code. It means if you want to send the value of a integer variable with the help of write function you have to convert value into ASCII format.
For example if suppose a variable x having value 87 x = 87; and we want to send 87 in the serial monitor. We have to send two character ASCII of 8 ( 0x38 ) and ASCII of 7 ( 0x37 ).
Serial Print vs println Function Difference
The Serial.write(x); function send x as ASCII and Serial.print(x) convert the x into digits and then send the ASCII of those digits.
write function use to send int type variable x.
int x = 87;
Serial.write(x);// this will send the “W” in serial monitor.
Note: 87 decimal is the ASCII code of “W”.
print function use to send int type variable x.
int x = 87;
Serial.print(x);// this will send the “87” in monitor.
Note: First print function convert integer to string ( 87 ) and send “87”.
How to Use Arduino Serial print Function to Send Integer Variable
It is very difficult to send value of integer variable with the help of Serial.write() function, the example below shows use of print function for the same task.
Example 1 – Serial.print function syntax to send the integer over serial port.
/*
	Arduino serial print vs write difference test code example
	https://elextutorial.com
*/
void setup()
{
  Serial.begin(9600);// Set the baud rate to 9600
}
void loop()
{
  int x = 87;
  Serial.write(x); // write in the int type variable.
  Serial.write("\n"); // send new line.
  Serial.print(x); // print in the int type variable.
  Serial.write("\n"); // send new line.
  delay(1000); // Wait for 1 second for next read.
}
The above code is a simple test for the print function. After every one second the print and write function is called and the data from the integer variable x ( 87 ) sent.
To have a clean display in the serial monitor window we have sent new line character in between.
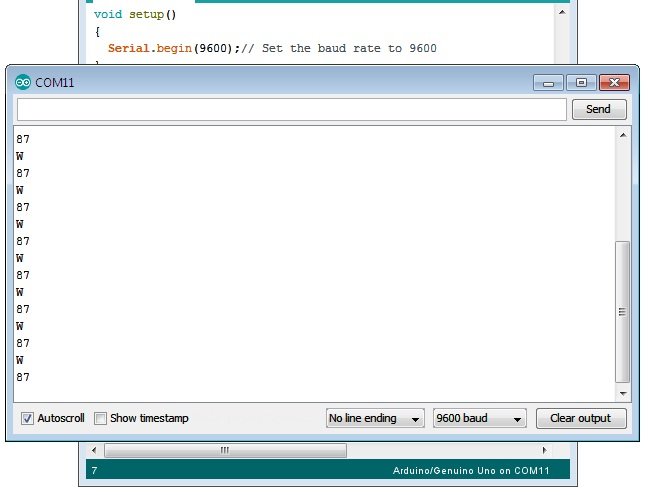
Fig.1 shows characters received in monitor program “W” and times 87, because 87 is decimal equivalent of “W”.
How to Use Arduino Serial print Function to Send String Variable or Text
The print function can also be used to send string or text variable over serial port. The below example shows the code for the same.
Example 2 – Serial.print function syntax to send the string over serial port.
/*
	Arduino serial print test code example to send string
	https://elextutorial.com
*/
void setup()
{
  Serial.begin(9600);// Set the baud rate to 9600
}
void loop()
{
  String s1 = "Welcome Back to https://elextutorial.com";
  Serial.print(s1); // print the string type variable.
  Serial.write("\n"); // send new line.
  delay(1000); // Wait for 1 second for next read.
}
The above code is a simple test for the print function to send the string.
To have a clean display in the serial monitor window we have sent new line character in between.
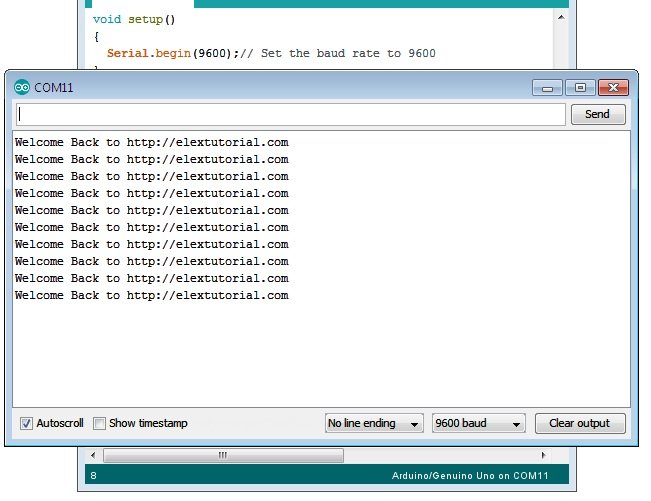
Fig.2 shows string received in serial monitor.
Arduino Serial println Function
The Arduino Serial println function does the same thing as compared to print, additionally println also send new line ( \n ) character in the end.
It means after sending integer or string println send one more thing, that is new line. In serial monitor the new line character is not visible, but the next received information is display on a fresh line.
The below example is used to show the decimal ASCII code of alphabet from ‘a’ to ‘z’.
Example 3 – Serial.println function syntax to send the ASCII table over serial port.
/*
	Arduino serial println test code example to send ASCII decimal code of character a to z.
	https://elextutorial.com
*/
void setup()
{
	Serial.begin(9600);// Set the baud rate to 9600
}
void loop()
{
	int x;
	for(x = 'a'; x<='z'; x++)
	{
		Serial.write(x); // send x as character.
		Serial.print(" decimal ASCII Code is => "); // print the string as it is for information.
		Serial.println(x); // print the int variable with new line.
		delay(1000); // Wait for 1 second for next read.
	}
	while(1);// Halt the program in infinite loop.
}
The above code is a simple test for the println function, used in the last to complete the line after sending the decimal value of character.
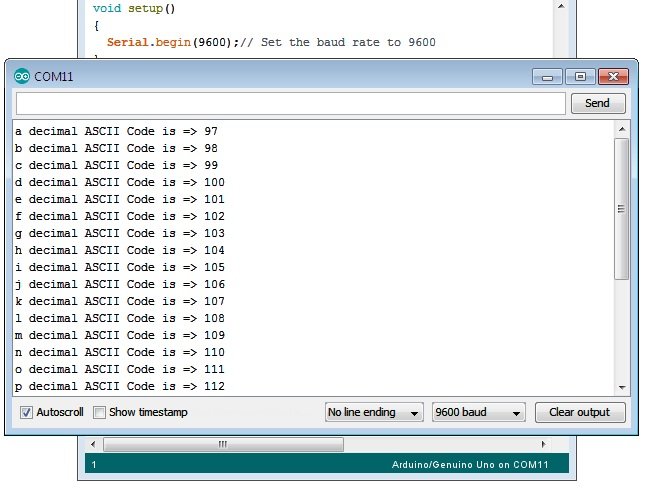
The figure above shows the display of decimal value of character in the serial monitor.
 Posted in
  Tags:
Tags: 


It’s an awesome piece of writing in support of all the online visitors; they will obtain advantage from it I am sure.|
When someone writes an paragraph he/she retains the image of a user in his/her mind that how a user can understand it. Therefore that’s why this article is outstdanding. Thanks!|
Hey I am so delighted I found your blog, I really found you by mistake, while I was looking on Aol for something else, Regardless I am here now and would just like to say thanks for a tremendous post and a all round interesting blog (I also love the theme/design), I don’t have time to browse it all at the minute but I have saved it and also added your RSS feeds, so when I have time I will be back to read more, Please do keep up the superb work.|
It’s awesome to go to see this site and reading the views of all friends about this post,
while I am also eager of getting familiarity.