May 7th, 2019
  Nilesh Chaurasia
 General Sibling Selector
General Sibling Selector is used to apply the design specification to the element which is the sibling of a defined element.
This Selector is represented by the tilde (~) symbol.
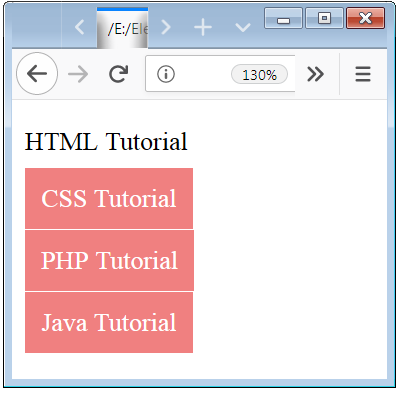
Example 1 – General Sibling Selector
<!DOCTYPE html>
<html>
	<head>
		<style>
			p ~ span
			{
				color:white;
				background-color: lightcoral;
				padding: 10px;
			}
		</style>
	</head>

	<body>
		<p><span>HTML Tutorial</span></p>
		<span>CSS Tutorial</span><br /><br />
		<span>PHP Tutorial</span><br /><br />
		<span>Java Tutorial</span>
	</body>
</html>
In the above examples, we used two tags p tag and span tag.
In the above example, we used a span tag which is inside a p tag and also used another span tag which is sibling to that p tag.
The design specification is applied to the all span element which are available siblings of that p element (define element).
Adjacent Sibling CSS Selector
Adjacent Sibling Selector is used to applying the design specification to the elements which are the adjacent sibling of a defined element.
This Selector is represented by the plus (+) symbol. This Selector is represented by the plus (+) symbol. And this selector is also known as “Next Sibling Combinator”.
Example 2 – Next Sibling Combinator Example
<!DOCTYPE html>
<html>
	<head>
		<style>
			p + span
			{
				color:white;
				background-color: rosybrown;
				padding: 10px;
			}
		</style>
	</head>

	<body>
		<p><span>HTML Tutorial</span></p>
		<span>CSS Tutorial</span><br /><br />
		<span>PHP Tutorial</span><br /><br />
		<span>Java Tutorial</span>
	</body>
</html>
In the above examples, we used two tags p tag and span tag.
In the above example, we used a span tag which is inside a p tag and also used another span tag which is sibling to that p tag.
The design specification is only applied to the span element whose content is CSS Tutorial, because this span element is the nearest sibling of a p element (defined element).

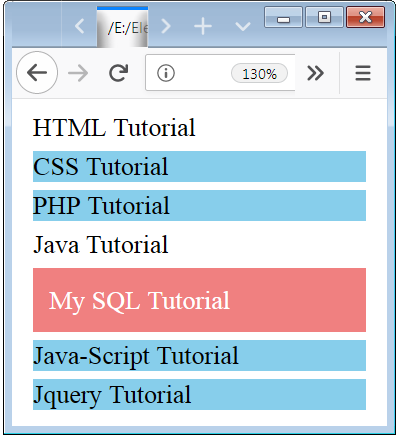
Example 3 – Another Example of Next And General Sibling Selector
<!DOCTYPE html>
<html>
	<head>
		<style>
			p
			{
				padding: 0;
				margin: 5px;
			}
			p ~ p
			{
				color: black;
				background-color: skyblue;

			}
			div + p
			{
				color:white;
				background-color: lightcoral;
				padding: 10px;
			}
		</style>
	</head>

	<body>
		<p>HTML Tutorial</p>
		<p>CSS Tutorial</p>
		<p>PHP Tutorial</p>
		<div>
			<p>Java Tutorial</p>
		</div>
		<p>My SQL Tutorial</p>
		<p>Java-Script Tutorial</p>
		<p>Jquery Tutorial</p>
	</body>
</html>
In the above examples, we used two tags p tag and div tag.
In the above example, we used a two different selector one is tilde operator and plus operator.
Here we define two different design specification to the p element. we used a p element inside a div tag and also have p elements which are siblings to this div element.
The tilde design specification is applied to the p element whose contents are CSS Tutorial, PHP Tutorial, Java-Script Tutorial and Jquery Tutorial because these p elements are the sibling of a p element (defined element).
The plus design specification is applied to the p element whose content is My SQL Tutorial because this p element is the nearest sibling element of a div tag (defined element).
No one design specification is applied to the p element whose content is Java Tutorial because this p element is inside a div element so this element is not a sibling of the p element.
 Posted in
  Tags:
Tags: